Wednesday, March 17, 2010

St. Pat's Day Message: Don't Be Afraid of the Fish


First, scones. For a long time this was solidly the only thing I knew how to cook. They're quick, they only require a few ingredients, most of which you already have around the house, and they are really easy. This is a real Irish recipe from my mom which explains why the directions are fast and loose. At this point she makes them as a general extension of her hands.

Scones:

  • 3 cups of flour
  • 1/4 sugar
  • Baking powder
  • 1 egg
  • Milk
  • ½ stick of margarine or butter
  • About a cup of raisins/crasins (personal favorite)/chocolate chips

Set oven to 350 degrees

Mix 3 cups of flour, a ¼ cup of sugar and a heaping teaspoon of baking powder with a colander.

Cut up a little less than half a stick of margarine and crush up into mixture.

Add a little less than a cup of raisins/craisins/chocolate chips and disburse through the mixture.

In a measuring cup crack an egg and whisk it with a fork. Then add milk until you have a little more than a cup but no more than a 1 ¼ cups. Whisk this mixture.

Make a divot it the center of the dry mixture and add the egg and milk.

Mix the dough in a clockwise motion until everything is totally mixed and the dough comes off the sides of the bowl into one clump in the center.

Place cookie sheet in the oven to heat.

Spread flour on the counter or cutting board, dump the dough out of the bowl, and sprinkle more flour on top. Kneed the dough by taking the outer edges and folding them into the center.

Once you have does this 6 or 7 times the bottom of the dough should be flat against the work space. Flip the dough over and press it down to create a rectangle ½ inch thick.

Cut circles into the dough using a cookie cutter or the rim of a glass. Take the sheet out of the oven and melt butter or margarine on the sheet. Place the scones on the sheet (they don’t usually expand out, but try to leave at least 1 inch between scones.)

Scones are cooked in 20 min., however depending on your oven, you may want to flip them over in 15 min. and cook the top side down for 5min.


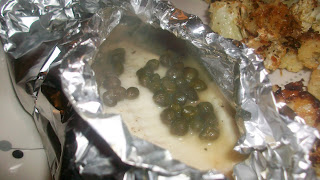
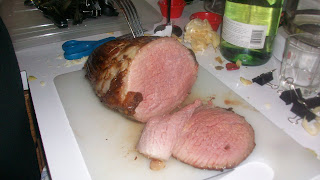
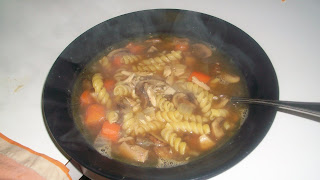
Now for my second Irish recipe. In my house we had lamb stew instead of corned beef and cabbage which I don't think I've ever had. Anyway this is a really good recipe and I don't have a ton to say about it except: you're welcome.

Thyme and Vegetable Lamb Stew

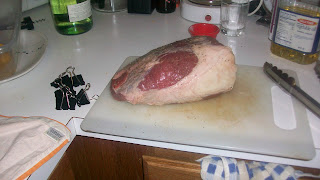
  • 1 pound(s) lean leg of lamb, stew meat, trimmed, cut into 1-inch pieces
  • 4 cup(s) fat-free chicken broth, reduced-sodium
  • 2 1/2 medium leek(s), or 2 large, white and pale green parts only, sliced
  • 2 medium stalk(s) celery, thinly sliced
  • 2 medium carrot(s), thinly sliced
  • 2 tsp dried thyme
  • 1 tsp table salt
  • 1/2 tsp black pepper, freshly ground
  • 1 medium potato(es), baking-variety, peeled
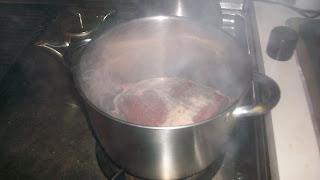
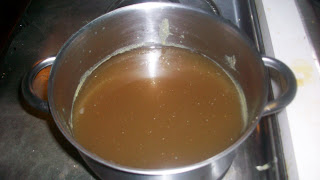
    Bring a large saucepan of water to a boil over high heat. Add lamb and cook 10 minutes; drain and set lamb aside.

    Pour broth in same saucepan; bring to a boil over high heat. Add leeks*, celery and carrots; reduce heat and simmer, covered, 10 minutes.

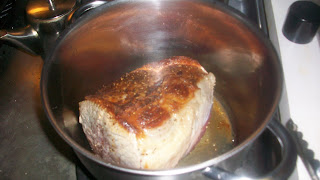
    Return lamb to saucepan; add thyme, salt and pepper. Simmer, covered, until lamb is very tender, about 45 minutes.

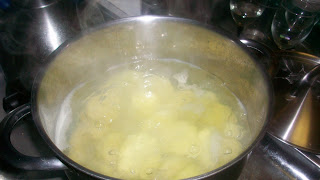
    Grate potato into stew, using small holes of a box grater. Stir well and reduce heat to lowest possible simmer. Cook, uncovered, stirring frequently, until thickened, about 10 minutes.
    *Leeks: so apparently leeks are pretty dirty inside (hahaha...lol.) You need to cut them length wise and pull the layers apart in a bowl of water to get the sand (?) out, before you slice them.

And now for the lecture about fish and how it's great and you shouldn't be afraid to eat it. I started cooking fish a while back and it is great. It defrosts and cooks really fast and it is crazy good for you. Your grocery store actually has flash frozen individual cuts of fish, so you don't even have to go to the counter and worry about deboning (haha...lol) it.

One of my favorite ways to eat fish is to steam it. Our frequent food guinea pig, Brian, is leaving the country next month to work in a farm in Chile, so we had him over to celebrate. Here is Brian celebrating:


So the fish. It works well with most fish; I've tried it with tilapia, cod, and salmon. Giada (with the big head of Food Network fame) uses salmon but here I made it with tilapia: http://www.foodnetwork.com/recipes/giada-de-laurentiis/salmon-with-lemon-capers-and-rosemary-recipe/index.html


A few adjustments, first, as a rule I don't have fresh minced rosemary around. As a rule I don't have any fresh herbs around because they mock me as I use them for a single recipe and then they wither and die with my ineptitude. Second, I used cherry instead of marsala wine because that is the only booze I can keep in my house that doesn't mysteriously disappear on a Tuesday night when Bridge and I decide that, while watching the original 90210 sober is fun, watching Ian Ziering a little drunk is way more fun. Third, if you don't have capers...buy some. They are really great. Lastly, I hear that people are afraid to cook fish because they're not sure when it is done. It's done when it flakes and tastes done; it's not that deep.


Now finally on this day of the Irish, I would like to impart on you a public service announcement. Please fill out your census form. It's really important for money and democracy or something. Bridge and I are really thrilled with our census:


See you all on the flip side!

Tuesday, March 2, 2010

America's Test Kitchen Meets America's Least Prepared Kitchen

Hello again my avid viewing public of six! I know you have probably missed me something awful, but this week was my roommate's birthday and I was very busy pretending that it is reasonable to fit forty people in my apartment to celebrate.
Lucky for you, however, Bridge's birthday lent me the opportunity to expand my culinary vocabulary to include roast beast. Specifically, while we were snowed in over the Snowpocalypse, we watched a lot of cooking shows, and in particular we watched an episode of America's Test Kitchen which featured roast beef salted over a twenty-four hour period and then slow roasted to perfection, and I thought, well I could totally do that.
As the title of the post suggested it all got a lot more complicated. You can find the the whole recipes for the roast and the mashed potatoes here
http://www.americastestkitchentv.com/recipe.asp?recipeids=4741&iSeason=9 and here http://www.americastestkitchentv.com/recipe.asp?recipeids=5414&iSeason=10 respectively without my witty comments but I will copy and paste them below as I go along with said witty comments for those who are interested in my commentary or uninterested in completing the sign-in form for America's Test Kitchen.

To the Main Event: Slow Roast Beef!

Serves 6 to 8
1boneless eye-round roast (3 1/2 to 4 1/2 pounds) (see note)
4teaspoons kosher salt or 2 teaspoons table salt
2teaspoons vegetable oil plus 1 tablespoon
2teaspoons ground black pepper

1. Sprinkle all sides of roast evenly with salt. Wrap with plastic wrap and refrigerate 18 to 24 hours.

OK, here is where I started to get into trouble (I know it's step one, the foreboding of being snarfed from the jump wasn't lost on me.) It turns out that my kitchen doesn't grow plastic wrap naturally, that instead you have to go out and buy it and bring it home, who knew? Anyway I nixed tin foil as an alternative for no concrete reason other than I thought that the roast my turn out tasting metallic (I feel dumber for having typed that.) Anyway, I wound up putting it in a larger freezer bag, pushing the air out, and sealing it tight with binder clips. No, I don't have a picture of this...something about pride.

2. Adjust oven rack to middle position and heat oven to 225 degrees. Pat roast dry with paper towels; rub with 2 teaspoons oil and sprinkle all sides evenly with pepper. Heat remaining tablespoon oil in 12-inch skillet over medium-high heat until starting to smoke. Sear roast until browned on all sides, 3 to 4 minutes per side. Transfer roast to wire rack set in rimmed baking sheet. Roast until meat-probe thermometer or instant-read thermometer inserted into center of roast registers 115 degrees for medium-rare, 1 1/4 to 1 3/4 hours, or 125 degrees for medium, 1 3/4 to 2 1/4 hours.

Here is where I hit snag two through six. First, it turns out I only have Teflon pans, and I don't think I have anything that I could in fairness refer to as a skillet. The only stainless steel crockery I own is a large soup pot. Turns out this was very fortuitous; not only did the soup pot sear it beautifully it created a natural guard against the hot oil and beef fat sputtering out of the pan. Also, something that the Test Kitchen fails to mention is the ridiculous amount of smoke that is emitted from searing which the soup pot, in part, funneled upward to my oven fan (the part that didn't reach the fan went directly into my lungs...happy birthday Bridge, I am now at least two years closer to my last.) In fact, I would recommend a soup pot even if you are fancy enough to own a skillet.

Now the other part of step two started really promising until I took it out after about an hour to check on the temperature and my meat thermometer told me I was already at medium. Before you write the Test Kitchen an angry letter on my behalf, it turns out my meat thermometer is janky. The Test Kitchen vehemently recommends one of those fancy digital ones that has a probe and a wire that stays outside the oven that Alton Brown always assumes people own, and if you have one I too would recommend it, especially over one that is, you know, broken.

3. Turn oven off; leave roast in oven, without opening door, until meat-probe thermometer or instant-read thermometer inserted into center of roast registers 130 degrees for medium-rare or 140 degrees for medium, 30 to 50 minutes longer. Transfer roast to carving board and let rest 15 minutes. Slice meat crosswise as thinly as possible and serve.

Needless to say given my false earlier reading I skipped to this step a little prematurely. The Roast was pretty rare, especially for someone raised to think that all pink needs to be cooked out of meat; but I was assured that for those not raised by Meta or any other old school Irish person, that the meat was great.

The Side Dish: French Mashed Potatoes with Cheese and Garlic

Serves 6

2pounds Yukon Gold potatoes (4 to 6 medium), peeled, cut into 1/2-inch-thick slices, rinsed well, and drained
Table salt
6tablespoons unsalted butter
2medium garlic cloves , minced or pressed through a garlic press (about 2 teaspoons)
1 - 1 1/2cups whole milk
4ounces mozzarella cheese , shredded (about 1 cup) (see note)
4ounces Gruyère cheese , shredded (about 1 cup) (see note)
Ground black pepper

1. Place potatoes in large saucepan; add water to cover by 1 inch and add 1 tablespoon salt. Partially cover saucepan with lid and bring potatoes to boil over high heat. Reduce heat to medium-low and simmer until potatoes are tender and just break apart when poked with fork, 12 to 17 minutes. Drain potatoes and dry saucepan.

So far so good:

2. Transfer potatoes to food processor; add butter, garlic, and 11/2 teaspoons salt. Pulse until butter is melted and incorporated into potatoes, about ten 1-second pulses. Add 1 cup milk and continue to process until potatoes are smooth and creamy, about 20 seconds, scraping down sides halfway through.

Well this time I got to step two before I screwed the pooch. It may shock you to learn that someone who resorted to a soup pot to sear beef, also doesn't have a food processor. What I do have are two good hands and the grit that the good Lord gave me, so I used a potato masher and a hand mixer and I think it worked out just fine.

3. Return potato mixture to saucepan and set over medium heat. Stir in cheeses, 1 cup at a time, until incorporated. Continue to cook potatoes, stirring vigorously, until cheese is fully melted and mixture is smooth and elastic, 3 to 5 minutes. If mixture is difficult to stir and seems thick, stir in 2 tablespoons milk at a time (up to ½ cup) until potatoes are loose and creamy. Season with salt and pepper. Serve immediately.

Well that is my post for this week. I know I have given you a lot too think about and your arteries a lot to hate and punish you for. I don't actually eat this bad on a regular basis, and I had intended to make a green of some kind to accompany this dish but with my false belief that the beef was slowing turning to ashes before my guests eyes, I thought I had to get a move on and serve...plus no one missed the greens.*

*See happy faces below....Note: Bridge is also happy but as official blogtographer, she reserves the right to not appear in the blog.

Tuesday, February 23, 2010

Chicken Part Deux: The Stock and The Soup

As mentioned I really only started roasting chickens (old hat that I am on chicken number two) because I thought that making chicken stock would be fun and very Little House on the Prairie-like. It turns out that it is less fun, then a really long process that, while not particularly involved, will make your home smell like a Campbell soup commercial for two days (which by the way, I am cool with it.)

To start, roast a chicken. You'll want to pick the chicken clean and put all of the bones and odds and ends in a large pot. Many of the recipes I saw recommended that you also dump in the gizzard, but I personally threw that away and wasn't super interested in investigating further as to what the scene was. I do, however, keep the stuff that I filled the chicken with to add to the pot.

You'll want to fill the pot with cold water so that it covers the chicken...I'm trying not to use the word carcass but it appears unavoidable...carcass with another two finger widths on top of that. In terms of veggies to add it appears from everything I've read to be a preference thing, but the standard is a couple of carrots, a couple of stalks of celery, and an onion. I didn't have any celery so that was nixed in mine and I also stuck a couple of cloves of garlic in for good measure. It is also variously recommended to add some acid. My sister-in-law specifically said apple cider vinegar (2 tps) so I went and bought a bottle of that which I now have to find recipes for, but I've read that lemon juice will work too.


Bring the pot to a simmer and let it simmer for at least three hours. You don't want it to be boiling so keep it super low; I actually only keep it half on the burner. There is also a fairly hot internet debate about whether you need to skim the froth that begins to form at the top. I have heard variously that the froth consists of toxins and that removing it will help to "clarify" the broth, but I wouldn't get crazytown about it.

The broth should simmer anywhere between three and twenty-four hours. I know what you're thinking: "Seriously? That is such a big range why even bother giving one?" Well I don't know. The first time I did it I simmered it for eighteen hours and the second time for five. The only appreciable difference is color, but I'm told that the longer you let it go the better it is for you.

Anyway, whenever you're done, remove the larger bones and veg and strain the rest into a bowl. Rinse the pot and pour the stock back in, cover with the lid and put in the fridge. Once it cools (I left mine overnight), remove the layer of fat on top and store in containers. If you want to store it over a longer period it freezes well, just make sure to leave room in the container for it to expand when it freezes.


I decided to make some soup for dinner with what I had in the fridge and it was bananas good:
3 carrots
4 oz (half a package) mushrooms
1/2 onion
1 cup of cooked chopped chicken
1 cup pasta
approx 4 cups of stock
salt
pepper
cayenne pepper (gasp! that's right Ailish Brady not only owns cayenne, she uses it at will)
oil of your choice or butter

Chop the carrots, mushrooms and onion and add to a largish pot with your choice of oil. Cook until the mushrooms start to release their water. Add stock and bring to a simmer. Add chicken and simmer soup until carrots are nearly cooked. Bring soup to a boil and add pasta, cook until pasta is tender. Season the soup as you go; as the broth reduces it will get more flavorful so be careful not to over salt.


That is all I got, chicken stock and delicious soup. USA! USA! USA!

Sunday, February 21, 2010

Russian Potato Croquettes...or whatever

Welcome to my blog. Let me start by saying that I am feeling queasy writing those words (though not because of the Russian croquette's*, 'cause those were delicious.) My roommate suggested I start a blog, and then there was badgering, and then she followed me around the kitchen taking pictures of me and I feared she would ghost write a blog in my name attributing boxed mashed potatoes to my culinary credit and I couldn't let that stand.

Anyway, tonight I decided on roast chicken and Russian potato croquettes. This is my second roast chicken, which was a big step for me as roasting something as big as a chicken felt really Martha Stewarty. With help from my mom and my sister-in-law the way I settled on to roast a chicken is as follows: take out giblets (ew), rinse chicken, pat dry inside and out and salt and pepper inside and out. After that it is pretty much a preference situation. I take a few tablespoons of butter and mash it up with herbs (whatever you have handy, dried or fresh) and spread over and under the skin (again, ew.) I also chop an onion into quarters and crack some garlic and fill the cavity (OK, my last ew.)


Stick in the oven at 350 until the thing pops up...yeah, I go by the thing.


As for the Russian croquette's, it is from a recipe I found on salon.com: http://tiny.cc/y1m3C

I'm not going to go through the whole thing because, well, its on the link and there is even an instructional video, but there are a couple of notes I would like to make:

1. My lord that is a lot of oil. As I sit here typing this I find it coming out of my pores. I feel like i'm one step closer to understanding the fall of the USSR - I mean how can you function with that much oil in your system.

2. I don't think I've ever "sweat" an onion before, but be advised that this whole thing takes awhile, like a long while.

3. You may note from the pictures that I added cheese. I like cheese, and it turns out I do not regret the decision. If anything I regret not adding more cheese to this already artery clogging meal. I shredded cheddar on the filling mixture, but any hard cheese would probably be great.


4. While the instructional video is really very lovely, the potato is harder to handle then it looks; especially when you realize that the chicken is done and you want to get a move on, so needless to say my croquette's were comically larger than pictured on Salon. Note: this did not effect the deliciousness.


5. I didn't feel the need to cook this in the oven. It was hot all the way through after the deep frying bit.


*Just as a totally ridiculous side note, you may notice that Salon calls them cutlets. That makes me mildly uncomfortable for no reason, so I have changed the name.


Anyway those are my notes for your consideration. As Bridgett joked tonight I really only make roast chicken to make chicken stock, which will be my next post if you are still interested in my New Year's resolution gone blog.